In homes with basements or places that often flood, a sump pump is a hidden hero. It keeps your lower level dry by pumping out extra water all the time. But, like any useful device, it needs regular upkeep to work at its best. Not only is it important to know how to clean a sump pump pit so that it works well, but it can also help the pump last longer. Let’s get down to the specifics of keeping your sump pump in great shape.
Knowing When It’s Time for Cleaning
Properly maintaining a sump pump is essential to ensure it functions effectively when you need it the most. Over time, sump pumps can accumulate debris and develop issues that hinder their performance. To keep your sump pump in optimal condition, it’s crucial to recognize the signs that indicate it’s time for cleaning. Here are some key indicators:
Signs that Suggest It’s Time for Cleaning
| Signs | What They Indicate |
| Strange Noises | Odd noises may suggest debris interference with the mechanism of the sump pump. These noises can include grinding, clicking, or banging sounds. |
| Visible Debris | If you can see dirt, sand, gravel, or other materials in the sump pump pit, it’s a clear sign that it’s time for cleaning. The accumulation of debris can obstruct the pump’s operation. |
| Odor | Musty or foul odors emanating from the sump pump area could be indicative of mold or mildew growth. This suggests moisture issues and debris buildup that need attention. |
| Inefficient Operation | If the sump pump is working harder or longer than usual to evacuate water from the pit, it may be struggling due to clogs or obstructions. This can lead to reduced efficiency. |
If you notice any of these signs, it’s essential to address the issue promptly to prevent potential pump failure during heavy rainfall or flooding.
Preparing for the Cleaning Task
Cleaning a sump pump is not a complicated task, but it requires careful preparation to ensure safety and efficiency. Here are the steps to prepare for cleaning your sump pump:
Safety First
Before you begin, prioritize safety by disconnecting the sump pump from its power source. This is crucial to prevent electrical accidents while cleaning. Make sure the power is completely turned off, and if your sump pump has a backup battery, disconnect it as well.
Gather the Right Tools and Supplies
Having the necessary tools and supplies on hand can make the cleaning process much smoother. Here’s a list of what you’ll need:
Tools and Supplies Checklist
| Item | Purpose |
| Plastic Scraper | Use a plastic scraper to remove debris and sediment from the sump pump pit. |
| Wet-Dry Vacuum | A wet-dry vacuum is helpful for suctioning out water and smaller debris. |
| Garden Hose | You’ll need a garden hose to flush out the sump pump system and clean the pit. |
| Large Bucket | A large bucket can be used to collect debris and sediment during cleaning. |
| Gloves | Wear gloves to protect your hands from contact with dirty water and debris. |
| Mask (Optional) | Depending on the condition of your sump pump pit, a mask may be necessary to protect against dust, mold, or bacterial particles. |
Protect Yourself
Before you begin cleaning, ensure your personal safety by wearing gloves to avoid direct contact with debris-laden water. Additionally, consider wearing a mask, especially if you suspect mold or mildew growth in the sump pump pit. Protecting your health is a priority during this task.
Step-by-Step Cleaning Process
Now, let’s get to the core of how to clean a sump pump:
Step 1: Uninstall the Sump Pump
The initial and critical phase in the cleaning process involves removing the sump pump from its pit. This step is essential to grant access for cleaning and inspection purposes. Depending on your specific sump pump model, you may need to disengage the discharge pipe before proceeding further.
- Gently extract the sump pump from the pit, taking care to ensure accessibility;
- Examine whether your pump necessitates the disconnection of the discharge pipe. If so, carefully loosen the clamps or bolts securing it to the pump to enable removal.
Step 2: Purify the Pump
Maintaining the sump pump’s functionality and preventing clogs is contingent upon thorough cleaning. Proper cleaning is instrumental in ensuring the effective removal of water from your basement. This step entails the elimination of any debris and sediment from the pump’s surfaces.
- Position the sump pump within a spacious receptacle or on a surface capable of withstanding moisture to catch any debris and runoff;
- Employ a plastic scraper or brush to delicately eliminate any debris, sediment, or sludge from the pump’s exterior. Pay close attention to the cleaning of the impeller and intake screen;
- Rinse the pump meticulously with a garden hose to eradicate any remaining dirt and grime. Ensure that all surfaces are immaculate and devoid of obstructions.
Step 3: Inspect for Damage
Inspecting the sump pump for damage is a crucial step to ensure it operates safely and effectively. Any visible issues should be addressed promptly to prevent potential failures.
- Carefully examine the sump pump for any visible damage or signs of wear and tear;
- Look for cracks or damage in the housing or casing that may compromise its integrity;
- Inspect the electrical components, such as wires and connectors, for any fraying or damage;
- Check for loose or disconnected parts that need reattachment.
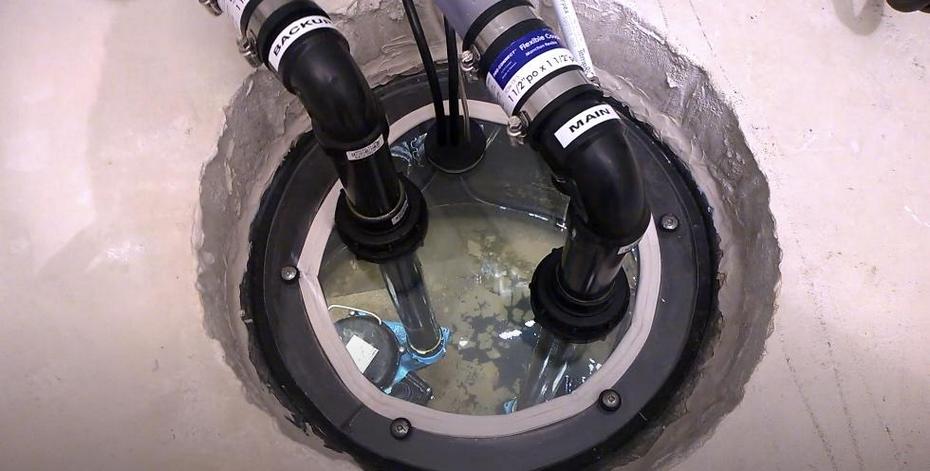
Step 4: Clean the Pit
Cleaning the sump pit is as important as cleaning the pump itself. A clean pit prevents debris from clogging the pump and ensures proper water drainage.
- With the sump pump removed, use a wet-dry vacuum to remove water and debris from the bottom of the pit. This helps maintain a dry and clean environment;
- Pay special attention to removing any pebbles, stones, or shards of metal that could potentially damage the sump pump or impede its function.
Step 5: Scrub the Pit
In some cases, the walls of the sump pit may accumulate mineral deposits or mildew over time. Cleaning these build-ups helps maintain a hygienic environment and prevents potential clogs.
- If you notice mineral deposits or mildew on the pit walls, scrub them down using a stiff-bristled brush and a mixture of water and a mild cleaning solution;
- Ensure that the walls are thoroughly cleaned and free from any residue that might affect the sump pump’s performance.
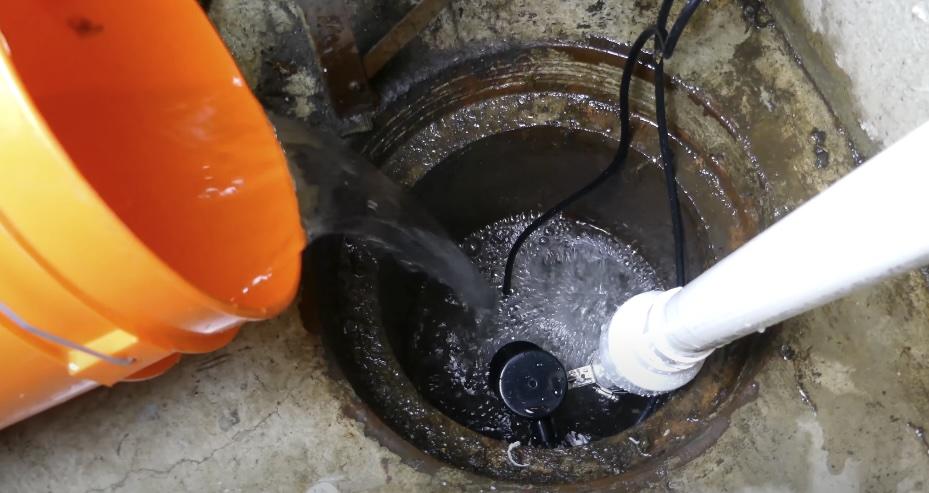
Step 6: Flush the System
Before reinstalling the sump pump, it’s essential to flush the system to remove any remaining debris in the discharge line. This step ensures that water can flow freely and prevents blockages.
- Temporarily reconnect the sump pump to the discharge pipe;
- Pour a sufficient amount of water into the sump pit to activate the pump. This flushes out any debris that may have accumulated in the discharge line;
- Observe the water flow to ensure it is unobstructed and the pump is functioning correctly.
Step 7: Final Touches
With the sump pump and pit clean and in working order, it’s time to complete the cleaning process and restore the sump pump to its original position.
- Carefully place the sump pump back into the pit, ensuring it is properly aligned;
- Reconnect all the parts, including the discharge pipe, clamps, and any electrical connections;
- Restore the power supply to the sump pump, and your sump pump system should be ready to efficiently manage water in your basement once again.
Top Tips for Maintaining a Happy Sump Pump
To keep your sump pump in excellent working condition and reduce the frequency of necessary cleaning, follow these preventative maintenance guidelines:
- Regular Testing: Routinely run water through your sump pump to ensure it starts and stops as expected;
- Check Valve Inspection: Make sure there is no water getting sucked back into the pit by checking the check valve on a regular basis;
- Battery Health: If your sump pump is equipped with a backup battery, be sure to check its condition and replace it when necessary to maintain reliable operation;
- Vent Hole Maintenance: Some sump pumps feature a vent hole in the discharge pipe. Ensure that this vent hole remains clear to prevent airlock issues and maintain optimal pump performance.
Conclusion
Cleaning a sump pump is a crucial task that many homeowners face. Although it’s not exactly high drama, learning how to clean a sump pump is critical for keeping water from wreaking havoc on your property. Maintenance will extend the life of your pump and prevent the need for expensive repairs. A well-maintained sump pump will last longer and perform better.
FAQ
How often should I clean my sump pump?
Aim to clean your sump pump at least once a year. However, if your area experiences heavy rains or rapid snowmelt, you might need to clean it more frequently.
Can I use chemicals to clean the sump pump pit?
Avoid harsh chemicals as they can corrode the pump and are unnecessary for a thorough cleaning. Stick to water and physical cleaning methods.
What should I do if my sump pump still doesn’t work after cleaning?
If cleaning doesn’t resolve the issue, the pump may require repair or replacement. Contact a professional for a diagnosis.
How long does it take to clean a sump pump?
Cleaning a sump pump can take a few hours, so it’s best to set aside half a day to ensure you can do a thorough job.
What’s the best way to prevent sump pump clogs?
Prevent clogs by installing a filter to catch debris and checking the pit for debris regularly. Also, ensure the pump’s intake grate is clear.