Leveling a floor is a crucial step in the flooring installation process, ensuring a smooth, stable surface that can support your chosen floor covering. But what if the price of a cheap floor leveling compound still stretches your budget too thin? Fear not—there are ways to achieve a level floor without breaking the bank or relying solely on a leveling compound.
Why Seek Alternatives to Cheap Floor Leveling Compounds?
While a cheap floor leveling compound might seem like a budget-friendly solution, there are several reasons why homeowners or DIY enthusiasts look for alternatives:
- Cost: Even the cheap floor leveling compounds can add up in price, especially when covering large areas;
- Availability: Sometimes these compounds might not be readily available in your area;
- Personal Preference: You might prefer a more traditional or different method of floor leveling;
- Sustainability: Eco-conscious individuals may seek more environmentally friendly options.
Traditional Methods of Leveling a Floor
Traditional methods of leveling a floor have been used for many years and can be effective if executed correctly. In this detailed guide, we will explore three traditional methods: sanding down high spots, using plywood or oriented strand board (OSB) sheets, and shimming floor joists. Each method has its own set of materials and processes to follow.
Sanding Down High Spots
Sanding down high spots is a common technique for leveling a wooden floor. It involves removing excess material from the high areas to create a more even surface. This method is particularly suitable for minor irregularities and imperfections in the floor.
Materials Needed:
- Belt sander;
- Sandpaper (various grits);
- Safety goggles;
- Dust mask.
Process:
- Identify the High Spots: Begin by thoroughly inspecting the floor to identify the high spots. These are areas where the floor is higher than the surrounding surface;
- Prepare Safety Gear: Put on your safety goggles and dust mask to protect yourself from airborne dust and debris generated during sanding;
- Sand the High Spots: Use a belt sander with the appropriate grit sandpaper to methodically sand down the high spots. Start with a coarse grit and gradually move to finer grits for a smoother finish. Work in a consistent manner to ensure even leveling;
- Check Progress: Periodically stop to check your progress and ensure that the high spots are gradually becoming level with the rest of the floor;
- Repeat as Needed: Continue sanding until all high spots have been smoothed down, and the floor is level. This process can be labor-intensive, so be patient and thorough.
Plywood or OSB Sheets
Using plywood or oriented strand board (OSB) sheets is another traditional method for leveling a floor without the need for leveling compounds. This approach is suitable for addressing larger uneven areas or subfloor deficiencies.
Materials Needed:
- Sheets of plywood or OSB;
- Screws;
- Drill.
Process:
- Measure Low Areas: Begin by identifying and measuring the low areas of the floor that need to be leveled;
- Cut Sheets: Cut the plywood or OSB sheets into appropriately sized pieces to fill the low spots on the floor;
- Secure Sheets: Use screws and a drill to secure the cut sheets to the floor joists. Ensure that the sheets are firmly attached and do not have any gaps;
- Layer Sheets: If necessary, layer additional sheets to achieve the desired level. Overlapping the seams of the sheets can help create a seamless surface;
- Check for Levelness: After installing the sheets, check the entire floor for levelness. Make any adjustments or add more sheets as needed to achieve a flat and even surface.
Shimming Floor Joists
Shimming floor joists is a method that involves adjusting the floor structure from below. This technique is particularly effective for leveling a floor when there is access to the underside of the floor, such as in homes with a crawl space or basement.
Materials Needed:
- Shims (typically made of wood or plastic);
- Hammer;
- Pry bar.
Process:
- Access the Underside: Gain access to the underside of the floor, either through a crawl space or basement;
- Identify Low Spots: Identify the low spots on the floor that need to be raised and leveled;
- Insert Shims: Place shims between the floor joists and the subfloor at the identified low spots. Hammer them gently into place until the floor becomes level;
- Use Pry Bar (if necessary): In cases where shimming alone does not level the floor, a pry bar can be used to help lift and adjust the joists to the desired level;
- Verify Levelness: Check the floor from above to ensure that it is now level. Make any additional adjustments by adding or removing shims as required.
Innovative Techniques for Leveling
Self-Made Leveling Strips
Creating self-made leveling strips is an innovative and economical way to address minor unevenness on a surface. This DIY solution involves cutting and stacking materials to fill in low spots before installing the final flooring.
| Material | Quantity (Approx.) | Purpose |
| Roofing felt or shingles | Varies | To create leveling strips |
| Utility knife | 1 | To cut strips |
| Adhesive | As needed | To secure strips to the floor |
Process:
- Measure the low spots to determine the amount of material needed;
- Cut the roofing felt or shingles into uniform strips using the utility knife;
- Stack the strips to achieve the desired thickness;
- Apply adhesive and secure the strips to the floor in the low spots.
Considerations:
- Ensure the strips are cut accurately for a snug fit;
- Stagger the seams if multiple layers are needed for added stability;
- Allow the adhesive to dry completely before proceeding with flooring installation.
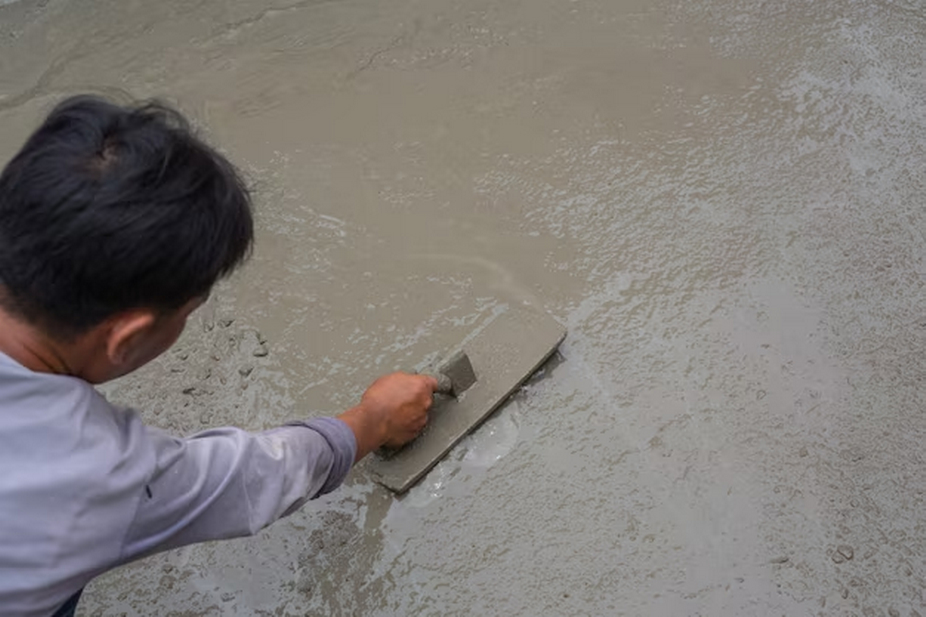
Grout or Mortar
Using grout or mortar is a time-honored method for leveling smaller areas. It’s an accessible option that requires few materials and can be easily mixed and applied with minimal tools.
| Material | Quantity (Approx.) | Purpose |
| Grout or mortar mix | Varies | To create a leveling medium |
| Water | As specified by the mix | To mix with grout or mortar |
| Trowel | 1 | To apply and level the mix |
Process:
- Mix the grout or mortar with water as per the manufacturer’s specifications to achieve the right consistency;
- Carefully fill in the low spots, using the trowel to smooth and level the mixture;
- Allow the material to dry completely, which may take several hours or overnight, depending on the product and ambient conditions.
Considerations:
- Make sure the mix is lump-free for a smooth application;
- Feather the edges to blend with the existing surface;
- Monitor the drying process and protect the area from moisture and traffic.
Pourable Underlayment
Pourable underlayment products provide a self-leveling solution that flows into low spots and levels out as it sets. It’s suitable for larger areas and creates a smooth, flat surface for flooring.
| Material | Quantity (Approx.) | Purpose |
| Pourable underlayment product | Varies | To self-level the surface |
| Mixing bucket | 1 | To mix the underlayment |
| Trowel or smoother | 1 | To assist in leveling the pour |
Process:
- Prepare the pourable underlayment mix in a bucket according to the product’s instructions;
- Pour the mixture over the surface, guiding it into low spots and aiding its distribution with a trowel or smoother;
- Work quickly and methodically, as the product sets rapidly and must be evened out before it begins to harden.
Considerations:
- Ensure the room temperature is within the recommended range for the product;
- Avoid creating air bubbles by mixing at the suggested speed and method;
- Keep the area traffic-free until the underlayment has fully cured.
Slab Jacking
Slab jacking is an advanced technique primarily used for concrete slabs that have sunk or shifted. It involves injecting a material underneath the slab to raise it back to the correct level.
| Material | Quantity (Approx.) | Purpose |
| Hydraulic pump | 1 (rental possible) | To inject leveling compound |
| Compound mixture | Varies | Typically polyurethane foam or similar |
| Drill and bits | 1 | To create injection holes in the slab |
Process:
- Drill strategically placed holes into the sunken concrete slab;
- Utilize the hydraulic pump to inject the compound mixture beneath the slab, raising it to the desired level;
- The precision of the lift can be controlled by the amount of compound pumped under the slab.
Considerations:
- Slab jacking is often a job for professionals due to the specialized equipment and expertise required;
- Care must be taken to ensure the slab is lifted evenly to avoid cracking or further misalignment;
- The compound used for slab jacking typically sets quickly, allowing for prompt use of the leveled area.
Floor Leveling Tools and Tips
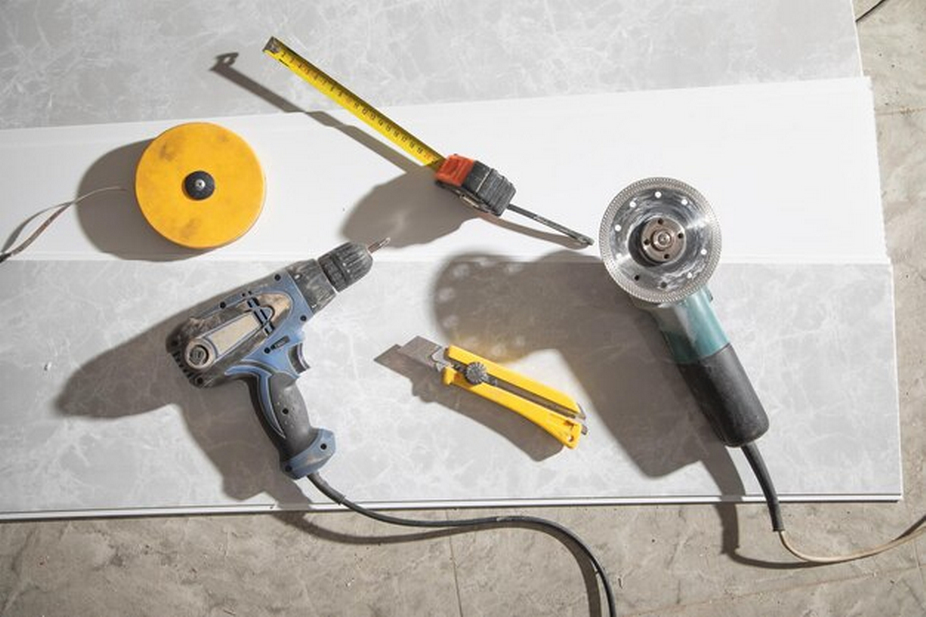
To achieve a perfectly level floor, it’s essential to have the right tools and follow proper techniques. Here’s a detailed guide on floor leveling tools and tips:
Tools
- Straightedge: A long, flat tool used to identify uneven areas on the floor. It’s crucial for pinpointing high and low spots;
- Spirit Level: This tool helps ensure that your floor is level horizontally. It’s indispensable for achieving precision;
- Tape Measure: Accurate measurements are vital when working on a level floor. Use a tape measure to determine the dimensions of your space and materials accurately;
- Trowel: Trowels are essential for spreading leveling compound or mortar evenly across the floor. They come in various sizes to suit different projects;
- Drill: A power drill with a mixing paddle attachment is handy for blending leveling compound or mortar to the right consistency.
Tips
- Clean and Prepare: Always start by thoroughly cleaning the floor and removing any debris, dust, or loose materials. A clean surface is crucial for achieving a level finish;
- Identify High and Low Spots: Use a long straightedge or a spirit level to identify high and low spots on the floor. Mark these areas so you can target them during the leveling process;
- Accurate Measurements: Before cutting any materials or mixing leveling compound, take precise measurements of the room’s dimensions and the thickness needed for leveling. This prevents wastage and ensures the floor’s uniformity;
- Start at the Highest Point: When applying leveling compound or mortar, begin from the highest point in the room and work your way towards the lower areas. This approach minimizes the amount of leveling material required, making the process more efficient.
Conclusion
Leveling a floor without a cheap floor leveling compound is entirely possible and can be achieved through various methods depending on your situation and preference. With careful planning and execution, you can create a level surface that’s ready for your new floor—saving money without compromising on quality.
FAQ
Can I level a floor with just plywood?
Yes, plywood can be used to level a floor by adding layers to the lower sections. Secure them with screws into the floor joists to ensure stability.
How can I tell if my floor is level?
Place a long straightedge or level on the floor. If it lies flat and there are no gaps underneath, your floor is level. For precision, use a laser level.
Is it possible to level a floor myself?
Many floor leveling techniques can be accomplished as DIY projects. However, if you’re dealing with significant discrepancies or structural issues, consulting a professional is recommended.
How much will I save by not using a cheap floor leveling compound?
The savings will depend on the size of the area and the method chosen. Alternatives like sanding or using plywood can save you considerably, especially for larger areas.
Will these alternatives last as long as a leveling compound?
When done correctly, these alternatives can have a comparable lifespan to a cheap floor leveling compound. The key is proper installation and ensuring that the floor is stable and securely fixed.
Can I install flooring directly over these leveling methods?
Yes, once the floor is level and the material has set or been properly installed, you can proceed with installing your flooring choice as usual.