In the midst of torrential downpours and rising water levels, the sump pump emerges as the unsung hero, tirelessly safeguarding the dry sanctity of your basement. But even heroes require loyal companions, and that’s where the sump pump float steps in. Mastering the art of adjusting a sump pump float is a valuable skill, one that can spare you the headaches of water-related woes. Join us on a journey as we provide you with a comprehensive guide to ensure your sump pump remains ever-vigilant and prepared for action.
Understanding the Sump Pump Float
A sump pump is an indispensable component in numerous homes, especially those situated in areas prone to flooding or with high groundwater levels. It plays a crucial role in maintaining the dryness of basements and crawl spaces by actively removing excess water that accumulates in a sump pit or basin. At the heart of this mechanism lies the sump pump float, a simple yet pivotal element that determines precisely when the pump should spring into action. Let’s delve deeply into the intricacies of sump pump floats, exploring their various types, functions, and the critical process of adjusting them for peak performance.
Types of Sump Pump Floats
Sump pump floats come in two primary types, each possessing its distinct features and advantages:
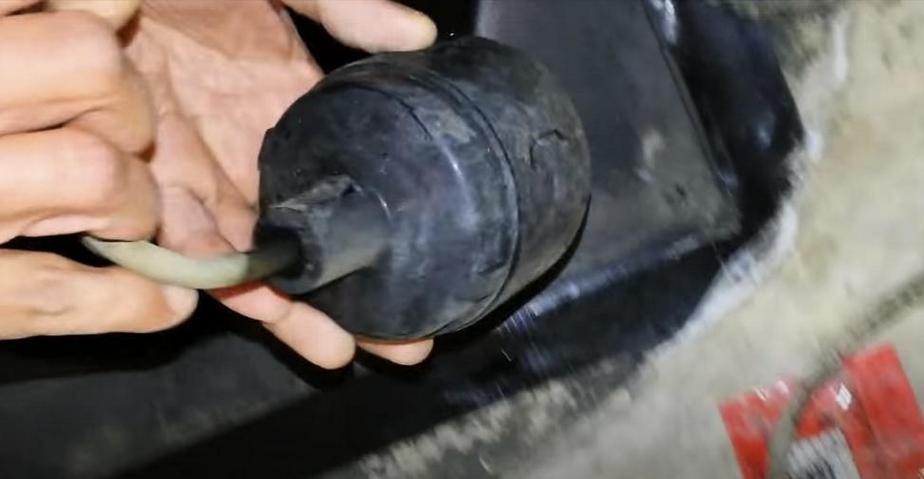
Tethered Float
The tethered float rises with the rising water level in the sump pit. When it reaches a certain level, it triggers the sump pump and the process of draining the water begins.
- Operation: As sump pit water rises, the tethered float rises too. When it reaches a certain height, the sump pump starts water removal;
- Advantages: Tethered floats are generally considered cost-effective and are particularly well-suited for larger sump pits that provide ample space for their unhindered movement;
- Considerations: In situations where the sump pit is comparatively smaller or if debris tends to accumulate, tethered floats may occasionally become entangled, potentially impairing their operational efficiency.
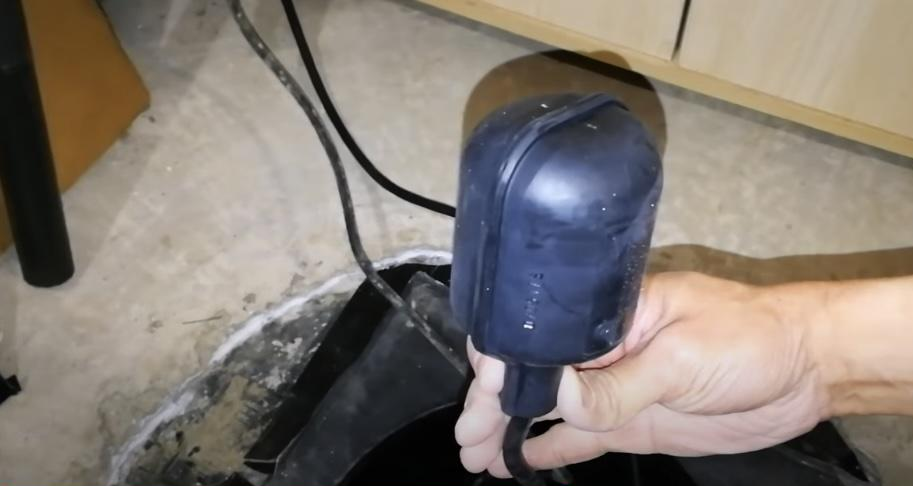
Vertical Float
As the name implies, a vertical float is characterized by its vertical movement along a rod that is securely attached to the sump pump.
- Operation: When the water level within the sump pit rises, the vertical float ascends vertically along the supporting rod. Upon reaching a predetermined elevation, it triggers the sump pump to engage;
- Advantages: Vertical floats are notably less susceptible to entanglement issues and are particularly well-suited for smaller sump pits. Additionally, their design often allows for a more precise activation point, enhancing their operational accuracy;
- Considerations: It is worth noting that vertical floats may entail a slightly higher initial cost compared to tethered floats. Moreover, they necessitate a bit more vertical clearance within the sump pit for unobstructed movement.
The Importance of Adjusting Sump Pump Floats
If you want your sump pump to work properly, you need to make sure the float is set correctly. Reasons why precise float adjustment is important
- Mitigating Overflow: The key to averting disastrous floods lies in the meticulous adjustment of your sump pump’s float mechanism. If the float is positioned too high, the sump pump may remain dormant until the water level reaches a perilously high point. This delay can lead to costly basement or crawl space inundations, an outcome that nobody desires;
- Preventing Excessive Cycling: To safeguard the longevity of your sump pump and its components, it’s imperative not to set the float too low. When the float is adjusted inadequately, the pump experiences an elevated frequency of activation and deactivation, subjecting the motor and switches to undue wear and tear. Consequently, the lifespan of your sump pump is significantly compromised;
- Optimizing Water Removal Efficiency: Achieving the delicate balance between flood prevention and pump efficiency hinges on accurately calibrating the float. Proper calibration ensures that the sump pump activates precisely at the requisite water level, facilitating efficient water removal and maintaining the sump pit’s water level at the desired threshold;
- Sustainable Energy Usage: By judiciously positioning the float to attain optimal operational efficiency, you not only benefit the environment but also enjoy economic advantages. Lower energy consumption translates to reduced utility costs and contributes positively to our planet’s well-being.
Proper float adjustment is a vital part of sump pump maintenance that can dramatically effect the performance and lifetime of your system. Let’s examine these reasons why precise float adjustment is so crucial in further depth.
Preventing Overflow
Imagine your sump pump float is set too high, allowing water to accumulate in the sump pit before activating the pump. In this scenario, the water level may rise to the point of overflow before the pump kicks in.
- Consequences: This delay can lead to basement or crawl space flooding, causing damage to your property and possessions. Water damage can be expensive to repair, and it can also pose health risks due to mold and mildew growth;
- Solution: Proper float adjustment ensures that the sump pump activates at the right water level, preventing such overflow scenarios.
Avoiding Frequent Cycling
Conversely, if the float is set too low, the sump pump may activate even when there’s only a minimal amount of water in the pit. This can cause the pump to turn on and off frequently.
- Consequences: Frequent cycling increases energy consumption and places unnecessary stress on the pump’s components. This can lead to premature wear and tear, reducing the overall lifespan of your sump pump;
- Solution: Precise float adjustment helps strike a balance, ensuring that the pump only activates when necessary, thus avoiding excessive cycling.
Ensuring Efficient Water Removal
Accurate float adjustment ensures that the sump pump activates at the right water level. This level strikes a balance between preventing flooding and minimizing unnecessary pump cycling.
- Consequences: When the pump activates at the optimal water level, it efficiently removes water from the sump pit, helping maintain the ideal water level and preventing potential flooding issues;
- Solution: Meticulous float adjustment ensures efficient water removal, maintaining a consistent water level in the sump pit.
Conserving Energy
By setting the float at the optimal level, you can ensure that the sump pump operates only when needed, minimizing unnecessary energy consumption.
- Consequences: Reduced energy consumption not only aligns with environmental responsibility but also leads to cost savings on your utility bills over time;
- Solution: Proper float adjustment can help you conserve energy and reduce your environmental footprint.
Steps to Adjust Your Sump Pump Float
Before you adjust the float, ensure your sump pump is unplugged to avoid any electrical hazards. Here’s what to do next:
Step 1: Safety Precautions
Before diving into the mechanical adjustments, you need to ensure that both you and your home are protected from electrical hazards. In this step, you should:
| Safety Step | Action Required | Purpose | Additional Notes |
| Disconnect Power | Unplug the sump pump from the electrical outlet. | To prevent electrical shock and ensure a safe work area. | Verify the pump is not receiving power before proceeding. |
| Dry Work Area | Make sure the sump pump area is dry. | To reduce the risk of electrocution. | If standing water is present, wear rubber boots and gloves. |
| Inspect for Damages | Examine the pump and cord for wear or damage. | To ensure the equipment is safe to handle and operate. | If damage is detected, consult a professional before proceeding with any adjustments or repairs. |
Important considerations include:
- Avoid using an extension cord to power the sump pump as it may not provide adequate power and could pose a tripping hazard;
- Test the GFCI (Ground Fault Circuit Interrupter) outlet, if applicable, to ensure it’s functioning correctly before plugging the pump back in after adjustments.
Step 2: Adjusting a Tethered Float
Tethered floats swing in a wide arc, turning the pump on and off. Proper adjustment is crucial for reliable operation. In this step, you should:
| Step | Description |
| 1 | Locate the Float: Identify the floating device tethered to your pump. |
| 2 | Adjust the Cord: Lengthen or shorten the cord to set the activation point of the pump. Shorten to activate sooner, lengthen to delay activation. |
| 3 | Secure the Adjustment: Use cable ties or clips to secure the cord at the new length. |
Key adjustments to consider:
- The tethered float should have enough room to rise and fall without obstruction;
- There should be a minimum of 3 to 4 inches of water in the sump pit before the pump activates;
- Ensure that the pump turns off with enough water left to cover the intake and prevent the pump from running dry.
Step 3: Adjusting a Vertical Float
Vertical floats slide up and down a rod, and they are more precise compared to tethered floats. They require careful adjustment for optimal performance. In this step, you should:
| Step | Description |
| 1 | Find the Float Switch: It’s located on the rod next to the pump. |
| 2 | Adjust the Switch Position: Move the switch up to raise the activation level, or down to lower it. |
| 3 | Tighten the Clamp: Once in the desired position, secure the switch using the clamp provided. |
Adjustment tips include:
- Make small incremental adjustments to avoid significant overcorrections;
- The vertical float should have a range of motion that doesn’t allow the switch to hit the lid of the sump pit but also doesn’t let the water level get too high;
- After adjustment, ensure that the float is freely moving without hitting the walls of the sump pit.
Step 4: Testing and Monitoring
After you’ve made your adjustments, it’s critical to ensure that they have been effective and that the pump operates as expected. For testing and monitoring, you should:
| Testing Activity | Description | Expected Outcome | Notes |
| Manual Testing | Fill the sump pit with water to the point where the pump should activate. | The pump should activate at the set water level and deactivate after lowering the water to the set off point. | Ensure the pump is not operating continuously and is turning off as intended. |
| Observe Cycles | Monitor how often and how long the pump runs during each cycle. | The pump should not turn on and off too quickly (short cycling) nor should it allow water to reach a level that risks flooding before activating. | Frequent on/off cycles can wear the pump out prematurely, while infrequent cycles can risk water damage. |
| Listen for Noises | Pay attention to any unusual sounds when the pump operates. | The pump should run smoothly without grinding, rattling, or other strange noises. | Unusual noises could indicate debris in the pit, mechanical issues, or problems with the float mechanism. |
Additional measures to ensure proper operation:
- Consider installing a water alarm to alert you if the water level gets too high;
- Periodically clean the sump pit to prevent clogging and ensure free movement of the float;
- Schedule regular maintenance checks to catch any potential issues before they become serious problems.
Conclusion
Adjusting your sump pump float is a DIY task that can save you from the perils of water damage. By mastering how to adjust a sump pump float, you ensure your pump operates only when necessary, prolonging its life and keeping your basement bone-dry. So, take charge of your sump pump, and never let a rising water level catch you off guard again.
FAQ
Q: How often should I adjust my sump pump float?
A: It’s not about frequency; it’s about necessity. Check it periodically and adjust as needed, particularly before expecting heavy rain.
Q: What signs indicate that I need to adjust the float?
A: If your pump is not activating when it should or is running too often, it’s time to adjust.
Q: Can I adjust the float if my pump is different from the types mentioned?
A: Most sump pumps work on a similar principle. If yours is different, consult the manufacturer’s manual for guidance.
Q: How do I know if my sump pump float is broken?
A: If the float is stuck, doesn’t rise with the water level, or is cracked or waterlogged, it may be time to replace it.
Q: Is it difficult to adjust a sump pump float?
A: No, it’s a simple process that homeowners can do without professional help. Just follow the steps outlined for your type of float.